iKVM
Secure Login
Network Cards
Hard drives
Time
SSHFS
Basic DNS
Website DNS
Certbot SSL
Apache and PHP
Maria DB
Mail Server Basics
Mail Server SSL
Mail Server Filters
Checklist
Backup
iKVM (Intelligent Keyboard, Video and Mouse)

Note: This article series covers configuring Debian 12 for hosting multiple domains and web sites on a single dedicated server. As such, some strategies may be inappropriate for your environment. Sockets for example are appropriate for communication between services hosted on the same machine but not suited to a set up with distributed services (where you'd use ports). Please consult the overview for more information.
KVM is an acronym for Keyboard, Video and Mouse.
In a server room you often have racks of servers and to save a bit of space you have 1 keyboard, 1 monitor and 1 mouse plugged in to something called a KVM switch that has all the server keyboard, video and mouse inputs plugged into it as well. Then when you want to interact with a server you hit a keyboard sequence (usually a double-tap of a rare use key like scroll-lock) and you input the number that corresponds to the server you want to use. The switch then connects you to your selected server and you can use it just like a normal PC.
You might think this sounds a bit like connecting through a command line or a remote desktop but it's better than that because you don't need an operating system running because you're literally on the box.
Modern motherboards have a version of this called iKVM (Intelligent Keyboard, Video and Mouse) which is the same thing except it uses the network card and you can connect to it with a basic interface over a network. This is very useful, especially if something bad happens like a hardware failure or you misconfigure something and the server doesn't boot up.
Dedicated.com servers have iKVM support. I'm using Ubuntu desktop this end and I struggled a bit to make it run nicely on Linux so I'm going to talk about what worked for me and hopefully this will save you a bit of pain!
The first thing you'll do once you get your shiny new server is to deploy an operating system to it and use iKVM to set your install options.
First off, log in to your dedicated.com account by visiting their home page (dedicated.com), choosing 'Customer Login' and enter the email address and password combination you signed up with.

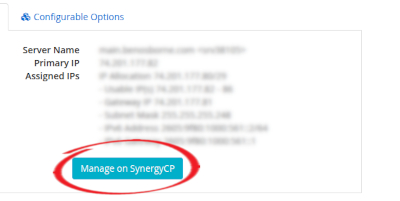
You should be taken to the client area where you can get support, manage your billing preferences and view your servers. Use the 'View Details' button to access a bit more information about the server your interested in.

Use the 'Manage on SynergyCP' button to view your server control panel.
You can use this control panel to do things like reboot your server. You should have been asked which operating system you'd like when you signed up (I chose Debian 12) and my control panel told me it was busy installing it and the interface warned me that the install process may look stuck for a while and not to worry.
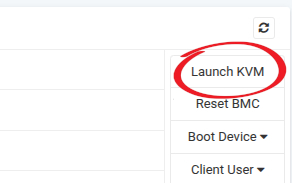
Give it a reasonable amount of time to do the basic set up (an hour or so should be more than enough!) and then try the KVM. From the server section (Hardware / servers / select your server), select the 'Launch KVM' button, a newish server will launch the KVM in the browser. Older motherboards need to follow the instructions below.
There is a line on the sales page that indicates slightly older servers that may need Java 8 installed, if you ordered one of those then here's what worked for me (I'm on Ubuntu), there were 2 options (Oracle or Amazon) - Amazon ended up working for me (after a reboot):
- Install Amazon Web Start
Here's a link to it: OpenWebStart_linux_1_12_0.deb - Install Amazon Coretto 1.8
It comes as an .rpm file and to run it on Ubuntu Linux you need a .deb file, so you need to convert it using Alien. I needed the b08 version (.rpm): https://github.com/corretto/corretto-8/releases - Run the 'Open Web Start' app
In the 'JVM Manager' section, use the 3 dots to select 'Deactivate JVM' on everything that doesn't say Amazon. Make sure you click OK to save the settings.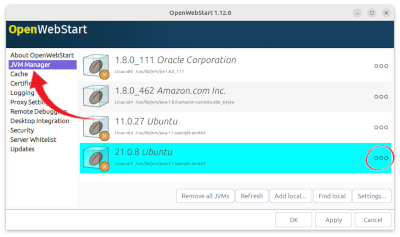
- This was the bit I wasn't expecting
Reboot your Linux PC (some library or other needed refreshing!). - Click the 'Launch KVM' button
Your browser will download a file, Open Web Start will run and ask you if you want to update to the latest version, say No (you need to run it on the older version!).
It also might ask you to confirm a few things, I just said yes to everything and it worked fine. If you're on Linux like me then you might have to fiddle with your firewall (I just turned it off temporarily!).
Here's a link to the dedicated.com knowledge base article which is a bit more comprehensive in detailing the steps but I think you need an account (and be logged in) to view it:
https://my.dedicated.com/index.php?rp=/knowledgebase/12/Accessing-Java-KVM-consoles-with-Amazon-Coretto-8-using-OpenWebStart.html
If you're still struggling, politely ask support for a bit of help. They might need to re-deploy your chosen operating system but rest assured they will sort you out.
I went for Debian 12 as my operating system and selected a minimal install...